PI-CHRONOS
GOAL
CONCEPT
- Needs to share a USB 3.0 Hard Drive over the network.
- Needs to run 24/7 365 days a year
- Must display the time and date that can be read from 2 metres away
- Must be able to add photos to the digital photo frame.
PURCHASES
| Controller | Raspberry Pi 4 Modell B 4GB ARM-Cortex-A72 4x 1,50GHz, 4GB RAM, WLAN-ac, Bluetooth 5, LAN, 4x USB, 2x Micro-HDMI | £47.99 |
| SD Card | SanDisk Ultra 256 GB microSDXC Memory Card + SD Adapter with A1 App Performance Up to 100 MB/s, Class 10, U1 | £29.99 |
| Case | Argon ONE Raspberry Pi 4 Case | £25.00 |
| Power Adaptor | CPC Official Raspberry Pi 4 USB-C PSU, UK Black | £11.00 |
| Touch Screen | 7 inch Portable Touchscreen Monitor for Raspberry Pi 4, Capacitive IPS Touch Screen Display 1024x600 Game LCD Extend Second Monitor | £44.99 |
| Powered USB Hub | Atolla 4 ports USB 3.0 Hub SuperSpeed Data Transmission with On Off Switch + 1 Charging Port with 15W(5V/3A) Powered Supply Adapter and 1M USB 3 Exten | £21.99 |
| Light Sensor | sourcing map Photoresistor Sensor Module Light Intensity Detection Digital Switch | £4.99 |
| Temp Sensor | AZDelivery Compatible with DHT11 Temperature and Humidity Sensor Module 3.3V 5V with Cable compatible with Arduino and Raspberry Pi including E-Book! | £3.49 |
| TOTAL | £189.44 | |
IMPLEMENTATION
The first step was to upgrade the Raspberry PI:
sudo apt-get upgrade
Next I needed to create a folder to host the app:
#create nasclock folder
mkdir NASClock
sudo chmod -R 777 /home/pi/NASClock
Now I needed a folder to host the images shared on the network so first we install samba:
#install samba
sudo apt-get install samba samba-common-bin
Now we set up the configuration to share the directories:
sudo nano /etc/samba/smb.conf
Adding the two sections below:
[USBDrive]
path=/media/USBHDD
read only = no
writeable = yes
browseable = yes
guest ok = yes
create mask = 664
force create mode=664
security mask=664
force security mode=664
directory mask = 2775
force directory mode = 2775
directory security mask=2775
force directory security mode = 2775
public = yes
only guest = no
[NASClock]
path=/home/pi/NASClock
read only = no
writeable = yes
browseable = yes
guest ok = yes
create mask = 0777
directory mask = 0777
public = yes
only guest=no
The user interface for PI-Cronos is an electron app which requires node to run. So we need to install it:
#install node and electron
wget https://nodejs.org/dist/v18.12.1/node-v18.12.1-linux-armv7l.tar.gz
sudo tar -xzf node-v18.12.1-linux-armv7l.tar.gz
cd node-v18.12.1-linux-armv7l
sudo cp -R * /usr/local
We also need to install .NET Core for the backend service:
#Install dotnet
curl -sSL https://dot.net/v1/dotnet-install.sh | bash /dev/stdin --channel STS
So now we need to make sure the .NET service starts
sudo nano /etc/systemd/system/NASClock.service
And add:
[Unit]
Description=ASP.NET Core App used by PI-CRONOS
[Service]
WorkingDirectory=/home/pi/NASClock
ExecStart=/home/pi/NASClock/NASClock
Restart=always
# Restart service after 10 seconds if the dotnet service crashes:
RestartSec=10
KillSignal=SIGINT
SyslogIdentifier=NASClockapp
User=www-data
Environment=ASPNETCORE_ENVIRONMENT=Production
Environment=DOTNET_PRINT_TELEMETRY_MESSAGE=false
[Install]
WantedBy=multi-user.target
Then run:
sudo systemctl enable NASClock.service
sudo systemctl start NASClock.service
And now let's boot up to the electron app automatically:
sudo nano /etc/xdg/autostart/NASClock.desktop
and add:
[Desktop Entry]
Name=NASClock
Comment=Electron UI for NASClock
Icon=app_icon
Exec=/home/pi/NASClock/electron/node_modules/electron/dist/electron /home/pi/NASClock/electron
Terminal=false
Type=Application
Ok we are almost there. Raspbian has a screensaver which we need to disable:
#disable screensaver
sudo apt install xscreensaver
This then allows you to go into the Raspbian ui and turn off the screensaver.
Now last bit was to turn off the mouse cursor:
#turn off mouse
sudo apt-get install unclutter
sudo nano ~/.config/lxpanel/LXDE-pi/autostart
and add:
@unclutter -idle 0
ok optional step here. Replace the splash loading screen with the splash image in the NASClock folder:
cd /usr/share/plymouth/themes/pix
backup the old image:
sudo mv splash.png splash.png.backup
sudo copy /home/pi/NASClock/splash.png ./
And that's it! Just need to reboot:
sudo reboot
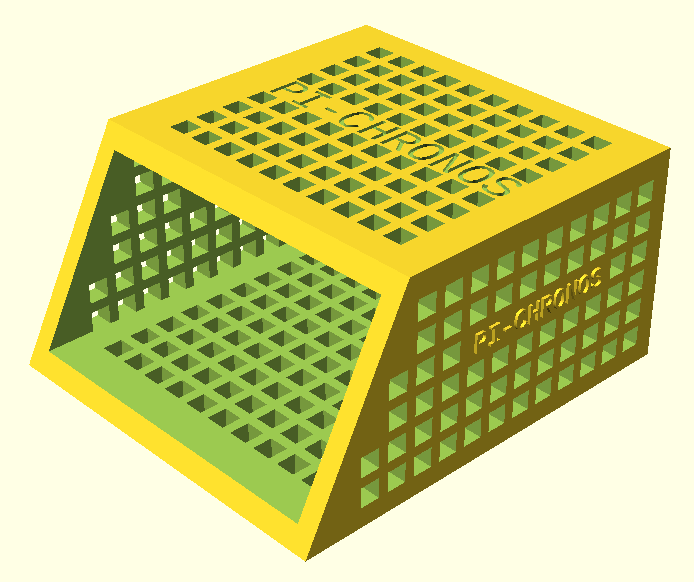
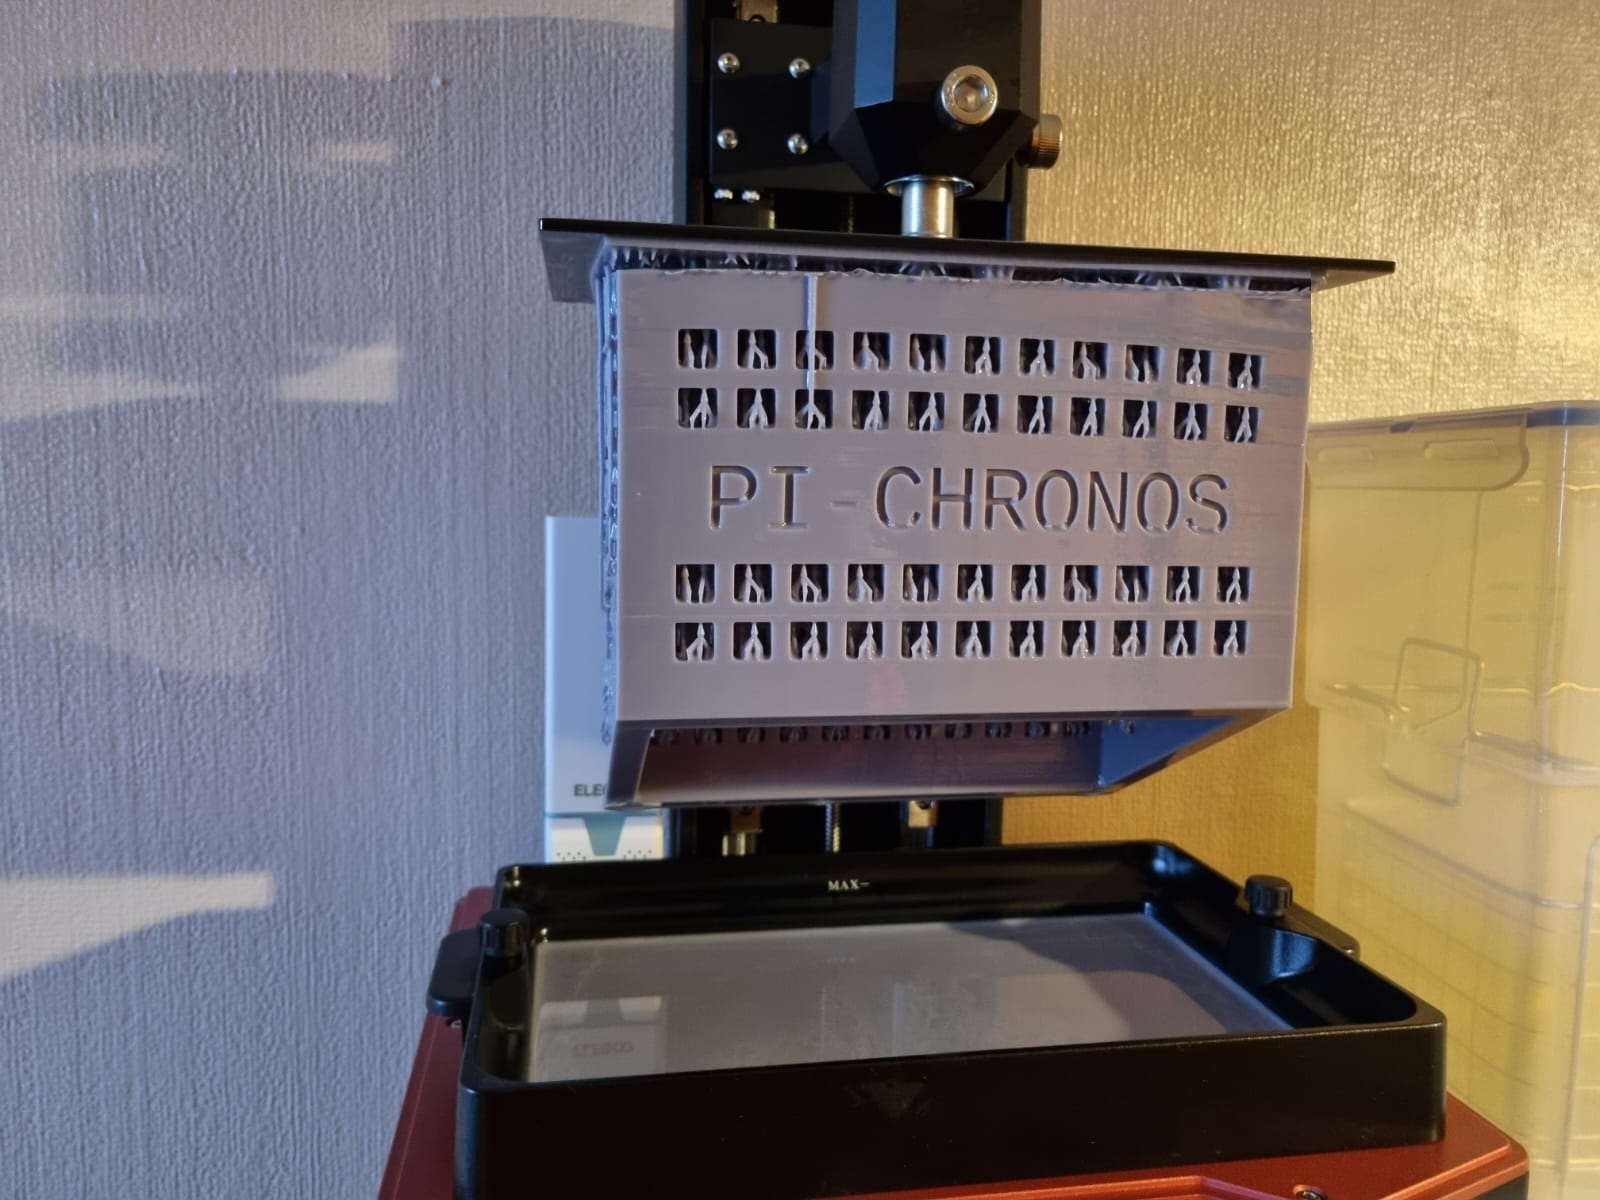
I used Openscad to create a custom case which can be found here.
MULTIMEDIA

CONCLUSION
The glare from the clock was too much when I was trying to sleep though so I got the clock to change to a sleep mode of just the time after 12am.
Because this PI is on 24hours a day it made sense to add in some other features like a bittorrent client
mkdir -p torrent_inprogress
mkdir -p torrent_complete
sudo apt-get install transmission-daemon
sudo usermod -a -G pi debian-transmission
sudo nano /etc/transmission-daemon/settings.json
Look for and change the settings:
"download-dir": "/media/USBHDD/torrent_complete",
"incomplete-dir": "/media/USBHDD/torrent_inprogress",
"rpc-whitelist": "192.168.2.73",
"watch-dir": "/media/USBHDD/torrents_todownload",
"watch-dir-enabled": true
Then I thought I would add an alarm which would wake up to a sound or music file of my choice. So I added some PI
speakers.I then thought with the speakers I could also turn it into a sleep machine so I downloaded free sounds of rainfall and thunder and waves and put up an option to play them.
Next I thought rather than have a time sensitive clock display that turned to the nightmode at 12am I would add a light sensor and have it switch automatically.
So I purchased a LM393 chip Photoresistor Sensor Module for £4.99 and set up an event that fired when the light was turned on or off. This fed the Daylight setting in the main Settings event which when changed turned the display to day or night.
Then I thought I'd connect to the BBC weather feed to display the weather for the day next to the date. I also added a thermometer to give me the temperature.
I then decided to add in the chimes from my parent's clock so I recorded them and had PI-Chronos play them. It chimes every 15minutes and on the hour chimes the number of hours.
All in all PI-Chronos has been a really satisfying success.